An interesting project came my way this week at work and took some digging to resolve. Each website utilizes a file called a robots.txt file that helps point search engine bots what areas of your site to crawl and which to ignore. This helps the bots crawl your site and help it appear on search engines and can impact your search rankings.
We’ve been using Yoast SEO for our primary SEO plugin on all of our sites for quite some time and albeit it buggy and catastrophic at times, however for the most part, it is the best SEO plugin available for WordPress.
Anyway, I was given the task to update the robots.txt file on each site to include a link to the sitemap.xml file, generated by Yoast. I immediately thought to check the site’s primary directory, but didn’t see a text file in that location. I then checked the built-in file editor in WordPress, but came up blank, as it only allowed me to edit template files. Hmm..
Oh, for some background, each of our websites is set up using the Multisite feature in WordPress. Each site in the network has its own set of options with Yoast and has an area to update the robots.txt. However, that option has been removed and I wasn’t able to find which version of Yoast removed that option.
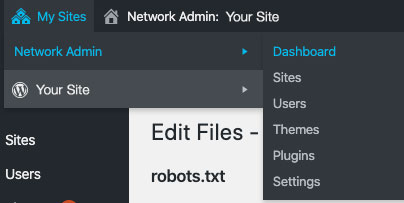
Finally, after digging much further, I was able to find that in the Network Admin area, another Yoast Options page exists. From here, you have the option to click Edit Files, which allows you to generate and modify the robots.txt file from within WordPress. Finally! Below are the steps I took to solve this problem.
- Click on Network Admin -> Dashboard
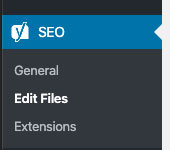
- Hover over the Yoast SEO options and click Edit Files
- Edit robots.txt
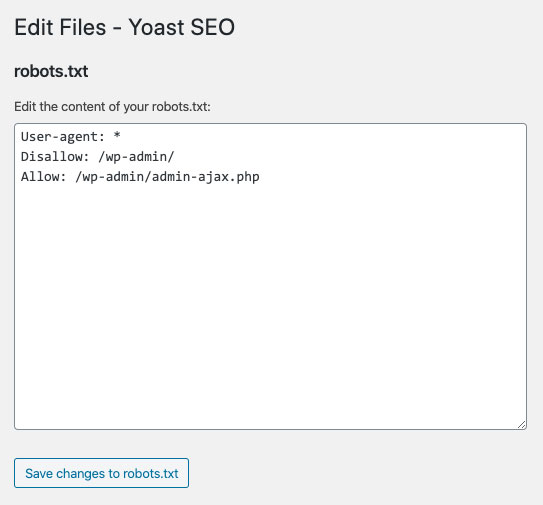
Note If a robots.txt file does not exist, in the current verion of WordPress, 5.4, clicking the “Generate robots.txt” button will redirect you to a page that has HTML markup not being rendered. Simply click the browser’s back button and refresh the page. You will then see the edit text area as seen above.